
Exciting: New Sewing and Craft Room! Dilemma: I needed a unique curtain for the small window. Where did I find my inspiration? In my husband's discarded clothing pile, of course! I love how the upcyled shirt curtain turned out, and the cost was $0.00. "Sew-Easy" to follow directions and photos are included.
Here's the small window (32-3/4" wide x 16" high) in my new Sewing and Craft Room. It has a nice view of the woods, but I wanted something to close when needed. I debated about a covering: Shade? Blind? Curtain? I decided a curtain would be best, and my husband hung a bronze curtain rod above the window. (Thanks, dear!)

The ultimate find: My husband's 2XL 100% cotton, Vintage Oxford, button-up shirt which he had designated to the "Give-Away Pile" (before the transformation).
 |
| Ultimate Find! |
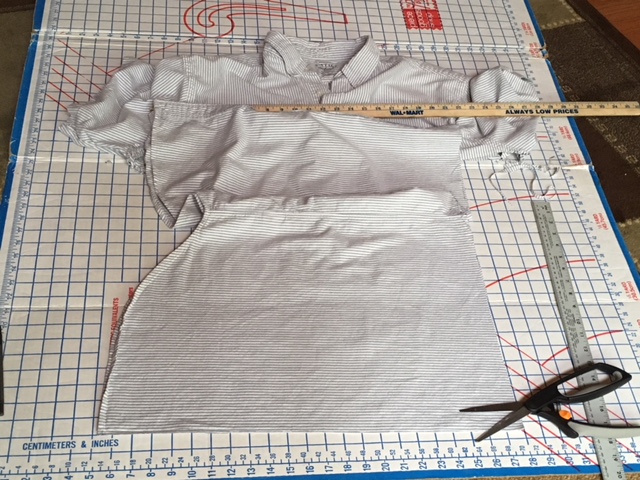
I needed as much fabric as possible for the length of the curtain, so I used a seam ripper to carefully remove the stitches of the underarm seams of the shirt. This gave me an extra 3/4" of fabric.

Now that the underarm seams were removed and steam-pressed, I used a yardstick and a pen to draw an even line across the shirt at the underarms.

I then cut along the line that I had drawn.

Next, I folded the shirt together and cut it down the back fold.
I turned the back edges under about 5/8" and again about 1/4" from the raw edges of both sides and sewed a narrow hem down both sides of the shirt back. I steam-pressed the hem flat.
 |
| Narrow hem down the back |
Finishing the Top Edge of the Shirt Curtain
Working on the backside, I folded the top edge of the shirt/curtain down 3/8" and steam-pressed.

With edges even, I sewed Single-Fold Bias Tape along the top edge of the shirt/curtain. I turned the ends of the bias tape under about 1/4" and edge-stitched. I then sewed the bottom edge of the bias tape to the shirt/curtain.


Sewing the Loops
Since the curtain has vertical stripes, I decided to make the stripes on the loops horizontal for contrast. I cut 2-1/2" strips of fabric for the loops from the remaining top and sleeves of the shirt. I cut enough strips to make 12 loops so I could have 6 loops on each side of the curtain.


 |
| And the loops were sown... |
I measured and put a pin on the top of the shirt/curtain so the loops would be evenly placed. I pinned each loop to the top edge of the shirt/curtain, with the edge of each loop placed 1/2" below the edge. I sewed three times and back-stitched the loops in place. I'm relieved that I didn't have to sew the bottom hem of the shirt!
Now, the new shirt/curtain is finished!
 |
| Finished curtain, front view |
 |
| Finished curtain, back view |
I love how the curtain looks on my Sewing and Craft Room window! The original hem of the shirt makes it look more interesting! I can button it closed or open as needed.
 |
| Shirt to Curtain? It can be done!! |
You have come up with yet another creative upcycle project, Nancy! It is good to see you are posting to your blog again.
ReplyDeleteThanks, Germaine! Sometimes I amaze myself, and this was one of those times. These curtains are definitely one of a kind!
Delete